How to Crate Train Your Puppy: A Step-by-Step Guide from Veterinary Experts
I’ll be honest with you. When I first heard about crate training, my initial reaction was pretty negative. Putting a puppy in what looks like a cage? Seemed wrong. But here’s what changed my mind: understanding that dogs are den animals by nature, and a properly introduced crate becomes their safe space, not a prison.
The difference between success and failure in crate training comes down to one thing: how you introduce it. Done right, you’ll have a puppy who voluntarily naps in their crate and stays calm during vet visits. Done wrong? You’re looking at anxiety, destructive behavior, and a whole lot of sleepless nights.
Studies show that 85-90% of dogs successfully adapt to crate training when positive reinforcement methods are used. But forced approaches? Those fail more than 60% of the time and often create anxiety issues that didn’t exist before.
Let’s talk about how to do this right.
Why Crate Training Actually Matters
Before we dive into the how-to, you need to understand why this matters beyond just giving you a break from puppy chaos.
Crate training accelerates housetraining significantly. Puppies instinctively avoid eliminating where they sleep, which makes the crate your best ally in potty training. It also reduces household destruction by over 70% during that wild adolescent phase between 6 and 18 months when your puppy suddenly decides your couch looks delicious.
But here’s what really matters: properly crate-trained dogs experience less stress during veterinary visits, boarding, and travel. If your dog ever needs surgery or has a medical emergency requiring restricted movement, a crate-comfortable dog recovers with far less anxiety.
And let’s be real. You need to shower, run errands, and occasionally sleep. A crate gives you peace of mind that your puppy is safe when you can’t supervise directly.
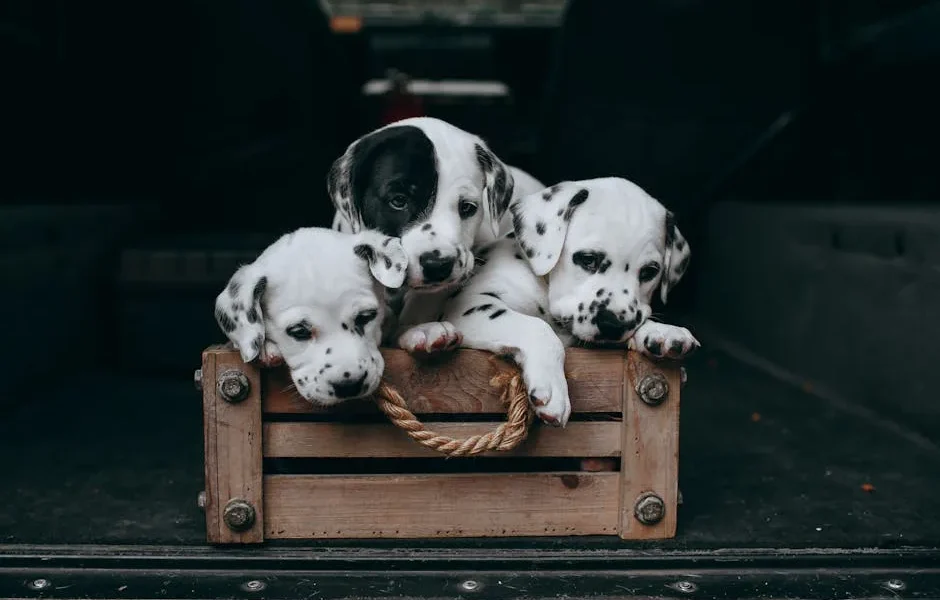
1. Choose the Right Crate Size and Type
This isn’t a “one size fits all” situation. Your crate needs to be large enough for your puppy to stand up, turn around completely, and lie down comfortably. But here’s the catch: not so large that they can eliminate in one corner and sleep in another.
For growing breeds, invest in a crate with dividers. You’ll adjust the space as your puppy grows, which is way more economical than buying three different crates.
Wire crates work best for most puppies. They provide excellent ventilation and visibility, which reduces anxiety. Some naturally anxious puppies prefer plastic airline-style crates because they feel more den-like and secure. Skip soft-sided crates entirely until your puppy is fully trained—they’re destruction waiting to happen.
Important note for brachycephalic breeds like pugs, bulldogs, and French bulldogs: extra ventilation isn’t optional. These breeds can overheat quickly, so monitor temperature carefully and never crate in warm environments.
2. Set Up the Crate Location Strategically
Where you place the crate matters more than you think.
For puppies between 8 and 16 weeks, put the crate in your bedroom at night. I know, I know. You might want your bedroom to be a puppy-free zone. But this proximity dramatically reduces nighttime anxiety and helps with overnight potty training since you’ll hear when they need to go out.
During the day, place the crate in a family area where your puppy can see and hear household activity. Dogs are social animals. Isolating them in a basement or garage can create anxiety and make training harder.
Once your puppy is comfortable and sleeping through the night (usually 3-7 nights for most puppies), you can gradually move the crate to its permanent location if desired.
3. Create Positive Associations Before Closing the Door
This step is where most people rush things and create problems. Don’t close that door yet.
Start by tossing treats near the crate. Let your puppy investigate at their own pace. No forcing, no pushing, no shoving them inside. When they show interest, toss treats just inside the entrance. Then deeper inside. Make the crate the place where good things happen.
Feed meals inside the crate with the door open. This creates powerful positive associations since food is basically the best thing ever in your puppy’s world.
Spend 2-3 days on this phase. Seriously. The patience you invest now pays massive dividends later.
4. Practice Short Closed-Door Sessions
Once your puppy willingly enters the crate for treats or meals, you can start closing the door. But we’re talking seconds here, not minutes.
Close the door while your puppy eats. Open it before they finish. Stay right there beside the crate. You want them to barely notice the door closed because they’re focused on something enjoyable.
Gradually extend the time. Stay nearby. When you can close the door for 10 minutes while your puppy stays calm, you’re ready for the next phase.
Use a cue word like “crate” or “bed” every time they enter. Eventually, this becomes a command they respond to happily.
5. Build Up Alone Time Gradually
Now we work on you leaving the room while your puppy is crated.
Put your puppy in the crate with a special toy or stuffed Kong (frozen peanut butter and kibble works great). Close the door and step out of sight for 30 seconds. Come back before any fussing starts. Gradually increase duration.
The key is returning before anxiety kicks in. You’re teaching your puppy that you always come back and being in the crate is no big deal.
This phase takes 1-2 weeks for most puppies. Don’t rush it.
6. Establish a Crating Schedule Based on Your Puppy’s Age
Here’s a rule veterinary behaviorists use: puppies can hold their bladder for roughly one hour per month of age, plus one.
So a 3-month-old puppy can handle about 4 hours maximum. A 4-month-old can do 5 hours. Adult dogs shouldn’t regularly exceed 8 hours, though many can physically hold it longer.
During the day, crate your puppy after meals, play sessions, and before naps. Most young puppies sleep 16-20 hours daily anyway, so you’re just providing a safe place for what they’d do naturally.
At night, puppies under 4 months typically need one midnight potty break. Take them out quickly and quietly, then right back to the crate. No playtime, or you’re teaching them that 2 AM is party time.
7. Handle Crying and Whining Correctly
This is where people crack. Your puppy will probably cry initially.
First, distinguish between protest crying and genuine distress. Protest crying is intermittent, attention-seeking behavior. It stops and starts. Distress is continuous, escalating panic.
For protest crying: wait it out. If you let them out while crying, you’ve just taught them that crying works. Instead, wait for a quiet moment—even just 2 seconds—then reward with calm praise or a treat through the crate door.
Most puppies adapt to overnight crating within 3-7 nights if they’re properly exercised and toileted beforehand. If crying continues beyond 2 weeks, consult your vet. It might indicate separation anxiety or another issue requiring professional help.
Here’s what’s important: make sure all physical needs are met before crating. Tired, toileted, fed puppies settle much faster.
Common Mistakes That Sabotage Success
Let me save you from the mistakes I see constantly.
Using the crate as punishment. Never send your puppy to their crate when you’re angry or as discipline. This destroys all the positive associations you’ve worked to build. The crate should only be associated with good things.
Crating too long, too soon. Pushing past your puppy’s bladder capacity guarantees accidents in the crate, which sets back housetraining significantly. It also teaches them it’s okay to eliminate in their sleeping space.
Dramatic departures and arrivals. Don’t make a huge fuss when you leave or return. This creates anxiety around your comings and goings. Keep it calm and boring.
Skipping the gradual introduction. Throwing a puppy in a crate and shutting the door creates fear, not comfort. Take the time to do it right.
Wrong crate size. Too large enables elimination in one corner. Too small is physically uncomfortable and potentially cruel.
Essential Tips for Faster Success
Make the crate irresistible by feeding every meal inside it. This creates the strongest possible positive association.
Use special toys that only appear during crate time. Puzzle toys, Kongs stuffed with frozen treats, or long-lasting chews work great. These keep your puppy occupied and create anticipation for crate time.
Exercise before crating. A tired puppy is a calm puppy. A 15-minute play session before crate time dramatically improves settling behavior.
Cover the crate with a blanket to create a den-like atmosphere, but ensure adequate ventilation. Some puppies settle faster when they can’t see all the action happening around them.
Never force your puppy into the crate by grabbing or pushing. This creates negative associations that undermine everything else you’re doing.
When Crate Training Isn’t the Answer
Let’s talk about something crucial: crate training doesn’t cure separation anxiety. In fact, it can make it significantly worse.
Between 20-40% of dogs with true separation anxiety injure themselves trying to escape crates. If your puppy shows signs of panic—excessive drooling, destructive attempts to escape, self-injury, or elimination despite being housetrained—you might be dealing with separation anxiety, which requires a completely different approach.
Red flags requiring professional help include persistent panic despite gradual introduction, regression after initial success, self-injury attempts, or excessive panting and drooling that doesn’t improve over time.
Some dogs genuinely don’t adapt well to crates. Puppy pens or gated safe rooms can be alternatives that provide containment with more movement space. There’s no shame in adjusting your approach if crating causes genuine distress despite doing everything correctly.
Phasing Out the Crate (Eventually)
Once your puppy is reliably housetrained and past the destructive chewing phase—usually between 1-2 years depending on breed and individual development—you can start giving more freedom.
Begin by leaving the crate door open during the day. Many dogs continue using their crate voluntarily because it’s become their safe space. That’s actually the sign of successful crate training.
Gradually extend freedom to one room, then multiple rooms, then full house access. Do this slowly over several weeks, watching for any regression in behavior.
Even after phasing out regular crating, maintain the positive association. Your dog may need to be crated for veterinary visits, boarding, travel, or medical recovery. Keeping those skills sharp means less stress when situations require temporary crating.
The Bottom Line on Crate Training
Crate training works when you respect your puppy’s needs and work at their pace. It’s not about convenience—though that’s a nice benefit. It’s about creating a foundation of safety and security that serves your dog throughout their life.
Most puppies achieve basic comfort within 2-4 weeks and reliable crating within 2-3 months. Your individual puppy might be faster or slower, and that’s fine. The worst thing you can do is rush the process and create anxiety where none needed to exist.
Will there be whining? Probably. Will you question whether you’re doing the right thing? Maybe. But when your teenage dog naps peacefully in their crate instead of eating your new shoes, you’ll be glad you invested the time upfront.
And if you’re also dealing with issues like destructive chewing or nighttime barking, a properly introduced crate often helps address those problems too.
Trust the process. Be patient. And remember: you’re not caging your puppy. You’re giving them a safe den that becomes their favorite spot in the house.
Medically reviewed by: Dr. Sarah Chen, DVM, DACVIM